Monday, 28 January 2013

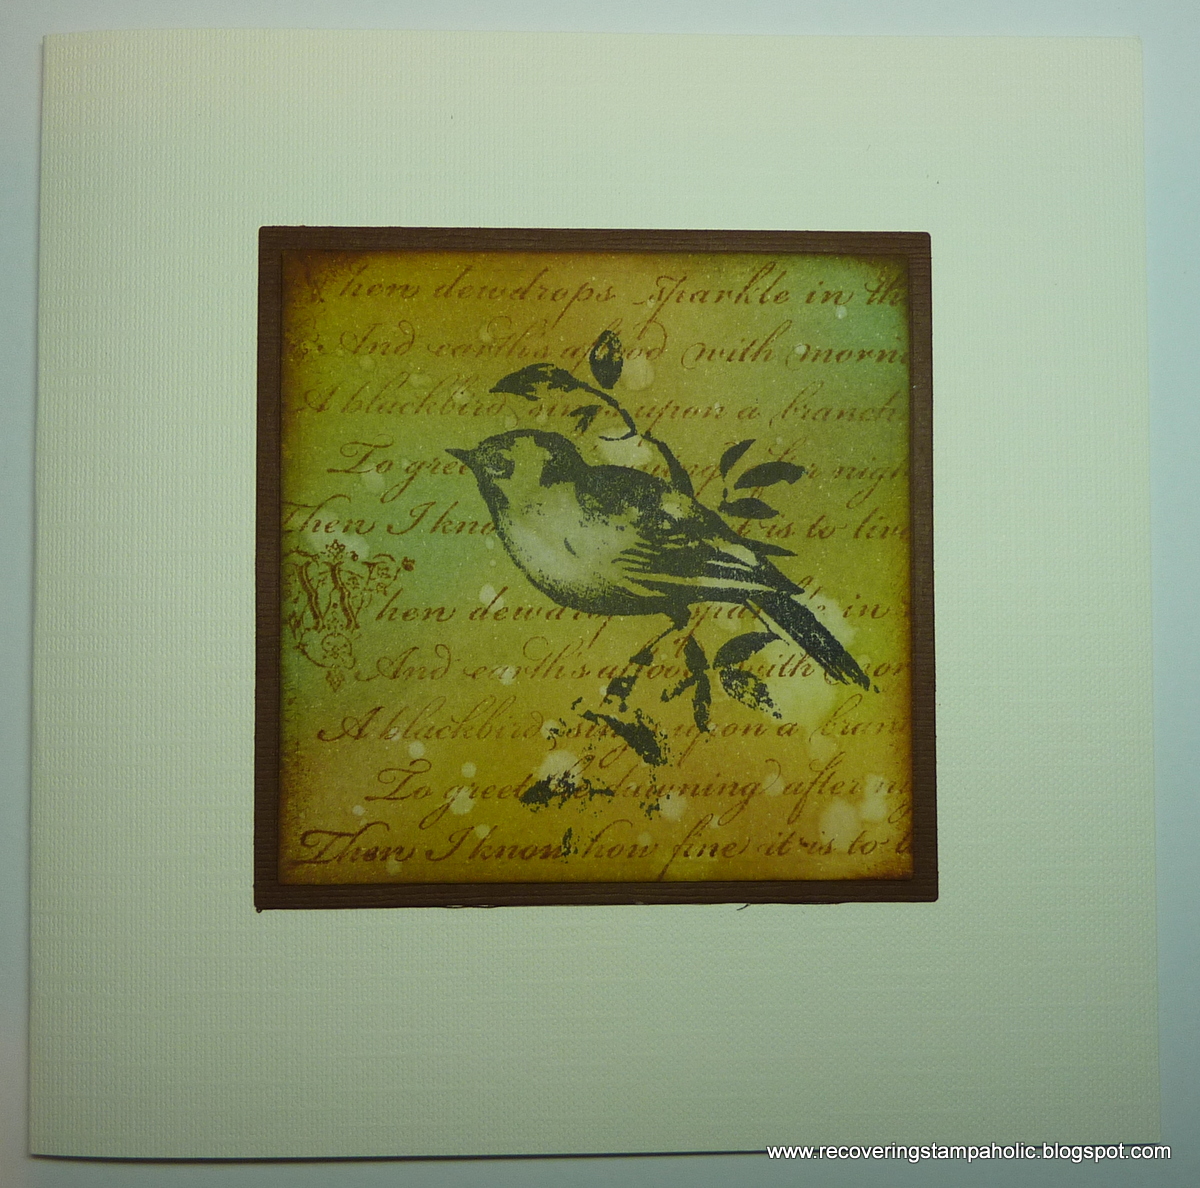
Woodware - A Little Birdie Told Me

Just as I was about to start writing about this weeks challenge card for Woodware, I went on to our DT blog. Apparently we have already done this challenge a few weeks ago and this week's challenge should be a Baby theme.
I can only apologise, I don't have time now to make a new sample. So I am trying to think out of the box. This little wren is sitting on her eggs .... so when you open the card it could say "Congratulations. A little bird told me you are expecting!"


 I have stamped the bird (Stampendous Nestled Bird CRR158) in brown ink then coloured in with coloured pencils. I have then splattered some gold and green mica paints over the panel be flicking my paintbrush to get a nice fine splatter.


The background was made very simply by sponging some soft green and yellow inks onto a piece of text paper (this is from my Oxfam bought French Dictionary). Then I stamped some foliage (Magenta Shadow Branch 37.266O) first in green then gold inks. I embossed the gold foliage with gold powder.
As a finishing touch I cut out two identical small rectangles from white and green card. On the white tag I stamped the sentiment (From Francoises clear set FRCL141 Owl Greetings) then punched out the small flower below it. Then I sandwiched them together and attached to the organza ribbon bow.


So, it's not what it should have been but hopefully you will appreciate what a beautiful image of a bird this is. I have used it several times already.
Next week I hope to be back on track with the correct theme. 
Have a good week!!
Siobhan x
 

Tuesday, 22 January 2013

Woodware - Bubbles and Bubblegum Pink


My goodness!! I don't know who chose this theme for us this week at Woodware but it was a bit of a challenge. I am not a pink person and I had to dredge through a lot of stamps to eventually find this old one designed by Francoise. This is FRN006  Champagne Celebration. I bought this years ago to make an engagement card.
I stamped the image in black twice and cut out one as a tag. This was coloured in with pink markers and then I added glitter to the  glasses on the second image, to cut out when dry and decoupage onto the tag. 


For the background I blended a couple shades of pink dye inks onto white card stock. To create the bubbles I used some small solid circle stamps (they came from an old winter Woodware clear set that has been discontinued). But any solid circles will do or even punch some out of craft foam with circle punches or dies. I spritzed with water, stamped and lifted off. This removes some of the ink leaving the bubbles. You may have noticed that this is a favourite technique of mine for building up layers in a background stamp.


To finish off I added some ribbon to the tag which I heated gently with my heat gun to cause it to crinkle and then added some glitter domes and clear gems for a little bit of sparkle.
I am second of out DT to post this week so I am looking forward to seeing what everyone else comes up with over at the Woodware blog.
I thought I would share another photo with you which I took through my craft room window. It is a female yellow hammer. There was a group of 4 of them feeding on the grass. I have never seen them in the garden before as they are usually a bird of fields and hedgerows. 


Wednesday, 16 January 2013

Woodware - Heart Felt Wishes


Our challenge this week over at Woodware is Heart Felt Wishes. Some of the Woodware team are over in the States for the winter CHA, lucky devils. Hopefully coming back with some exciting new products to tempt us. I must admit that is one of the things I do miss now that my shop has gone. I loved going to trade shows to see all the lovely new things and get to participate in some really good workshops. Working in the NHS doesn't really offer the same excitement!! 

Anyway my sample for this week's post uses the absolutely gorgeous Stampendous stamp CRP147 Butterfly Post. I just stamped it in a dark brown ink and blended some soft pink inks over the edges to soften it. 
I also stamped the butterfly onto vellum and embossed it with clear powder. I cut this out and added some pink glitter pen over the top of the wings for a bit of shimmer.


I did a bit of background stamping with the flourish from the Cling Jumbo Hollyhocks set. The flower was made from about 8 large daisies punched out of the vellum or parchment paper. The tips of the daisy were sponged with a soft pink ink, and the glittery centre is one of the glittery snowballs that Woodware started selling last year (not just for Christmas!!)


I also used a crafty edger punch for a lacy border. I always find butterfly cards are popular for birthdays and I love this stamp. It's one I have used many times.
Well that's it for this week. Be sure to pop over to the Woodware blog for great inspiration. 
Siobhan x

Thursday, 10 January 2013

Woodware Sketch Challenge


It's another sketch challenge this week at Woodware. This week's sketch looks like this :

So a nice simple sketch and I have kept mine very simple this week. I have had a bit of a busy week at work and by the time I get home I find I am just too tired to be creative. 

I have used a cute little Stampendous stamp CRH282 Cling Feather Bonnet Baby. I bought it as a cute stamp for Easter but I thought it could be used for a baby card or even a birthday.


I don't think I need to explain anything for this one. The flourish of pearls are from Woodware. They come on a clear plastic strip and are so easy to use. Someone did ask how I evenly rounded the corners. I cut two squares of patterned paper (14cm square in this case) then cut them in half diagonally. Turn them over an butt them together neatly the stick with D/S tape. Once joined it's easy to round the corners with a punch.


There are three little chicks in this range. I bought mine from The Stamp Man and it took me ages to decide which one to go for. Of course I will probably get the other two next time!!
 Stampendous Feather Bonnet Baby Cling Rubber Stamp - CRH282Stampendous Floral Bonnet Baby Cling Rubber - CRV234Stampendous Posie Bonnet Baby Cling Rubber Stamp - CRH283

Thank goodness tomorrow is Friday....!! I am away to have a bath to ease my aching feet. I am trying to break in a new pair of work trainers and it is not going well!!
Have a good weekend.
Siobhan x

Friday, 4 January 2013

Woodware - Vintage Hearts and Love

This week's theme at Woodware is called "Vintage Hearts and Love". Before we know it Valentine's Day will be upon us!! So this card will be put away to give to my hubby on the day. He will probably fall about laughing. Firstly we don't usually bother now with Valentines Day cards and secondly he doesn't really do the whole romance thing!! Then he will feel all guilty because he didn't get me anything!!
I have used a Magenta cling set as my main image (37.257Q Retro Romance). As the name implies it is quite a modern image so I have tried to make it more vintage.

The image was stamped and embossed with white powder. Then I blended 2 or 3 shades of brown inks over the resist and buffed it up with a bit of kitchen towel to make the white pop.I painted the centre of the hearts with Pearl-ex gold to make them shimmer.


For the next panel I softly blended the same brown inks onto a square of white card stock. I used a flourish stamp (this one is the ornate border from CRS5031 Jumbo Hollyhocks by Stampendous) spritzed with water to lift off some of the ink to give a watermark effect. Then I stamped some script across the panel. This lovely script is from Stampendous CRS5029 Jumbo Songbird.
The background bronze card had a little bit of stamping in the corners embossed with a detail gold powder. This little vine was actually part of CRP110 Dragonfly Vine. I like to use parts of a stamp sometimes  to add little details. I think as a previous shop owner I was always trying to show people just how versatile stamps can be. I guess old habits die hard.

 
The words were computer generated and the lace is a Woodware product that is self adhesive making it so easy to use.
I suppose it could be a wedding card too.
Have a good weekend. At least the weather promises to be a bit better. 
Siobhan x

Saturday, 29 December 2012

Woodware - Just a Note

I thought I would have a bit more crafting time over the Christmas period. But by the time I got the Christmas dinner on the table I was shattered. I don't know about you, but as I get older I find the run up to Christmas extremely exhausting. Husbands just seem to expect Christmas to happen as if by magic. It's when they ask things like "And what did you get for my parents?" that I just want to disappear into a quiet place and hibernate until it is all over.
This week at Woodware the theme is "Just a note". Rather than a card I had great plans to decorate a note book for myself, to keep tabs of my crafting deadlines. But so far I have just managed the front cover. This is a work in progress so please forgive me!!
I had a nice plain black notebook that I bought a while ago and thought it would be nice to decorate. Those of you who know me will know I have a thing about nice notebooks. But this one will be dedicated to all things crafty, like DT deadlines, interesting websites and a record of ink pads and pens etc to avoid duplicate buying at craft shows!! 


I used dictionary paper then stamped a selection of Stampendous stamps. I added a bit of Frantage powders to the flourish stamp and also on the metal bookplate. 

 
I filled in the bookplate with glossy accents. I added a bit of colour with some coloured pencils.


 I love the magnolia stamp. The botanical style image just fit my theme perfectly.
On the inside I started stamping but as I already said this is a work in progress. The green is too bright for me so I will cover the inside covers as well. And I will divide the book into sections using file tabs and more stamped images.


I will show it to you once completed!!
I would like to wish all of you a Happy New year, especially to my friends and fellow DT members. I hope you get some quality crafting time over the holiday!!
Siobhan x

Friday, 21 December 2012

The Stamp Man - In the bleak mid winter

Well it has certainly been a bleak mid winter this week with not a snowflake in sight!! And that's our theme this month at The Stamp Man challenge blog.
For my project I revisited a technique I haven't used for years - using household bleach. I used my all time favourite Dreamweaver stencil LJ849 Bare Trees Silhouette. I taped the stencil down onto black Bazzill card stock and spritzed neat cheap household bleach over the entire stencil.


Then with a piece of torn paper I covered the top two thirds of the stencil and spritzed again to further develop the bleaching effect to create an horizon line. I also cut out a circle mask and spritzed through that to create the moon. Remember to cover your work surface well and avoid the temptation to wipe your hands on your jeans!!


To finish off I used Stampendous Aged Ivory Frantage embossing powder on the Tim Holtz snow flurry border, round the edges of the background panel and also on the die cut snowflakes.
The reindeer was die cut from mount board and I built up several layers of the Aged Gold Frantage embossing powder then sank a flourish stamp into the hot layers to give the deer some nice textural detail.
Although dark and moody I thought it kind of captured the mood of the bleak mid winter theme. 
There is a voucher to be had if you enter the challenge, about 60 people have and there are some great interpretations of the theme. Check out the blog for details.
Merry Christmas everyone. Hope you have a lovely time with friends and family and don't over indulge too much. My highlight in the run up to Christmas will be sitting watching the final of Strictly Come Dancing tomorrow night with a glass of wine and some tapas (my hubby is cooking!!)
Siobhan x

Monday, 17 December 2012

Woodware - A Little Birdie Told Me

This week at Woodware we are no longer doing Christmas. The theme for this week is "A Little Birdie Told Me". I must confess I have been so busy at work, Christmas shopping and making all the things I meant to do weeks ago that I totally forgot about this week's challenge until yesterday. So this was a bit of a rush job. I made it before breakfast so that I could photograph it and then by lunch time it was in the post for my sister's birthday. If it gets to Ireland in time for the 19th it will be a miracle!!


My bird is one of my favourite Stampendous bird stamps CRC237 Cling Lone Bird. First I blended some yellow, orange and red inks over a panel of text paper from an old book. Then I sponged through a circle mask to create the sun. The flower silhouettes are all from clear Artemio sets I have. The bird was also stamped in black onto the panel. Then I used brush markers and stamped again onto white card and cut out the bird's body.


I roughed up the edges a bit with the edge of my scissors and mounted onto Kraft card. The background paper was from my stash but I added some script using the word stamp from CRS5029 Cling Jumbo Songbird  and some foliage near the base.

The flower embellishment was made from 2 circles of Kraft card (green and yellow Woodware circle punches) I sponged the edges with ink and roughed up the edges with scissors. Then I shaped them on my firm spongy mat with a large ball embossing tool. A stitched button finishes my rustic flower. 
I am first up this week, so I will be checking daily the  Woodware blog to see what the other girls come up with.
Siobhan x

Tuesday, 11 December 2012

Woodware - Christmas Tags and Toppers

This week's challenge at Woodware is "Christmas Tags and Toppers". I made tags last year for this challenge. So this time I thought I would make some toppers which I am using to decorate jars for some of my colleagues at work. I bought the jars at Lakeland because I wanted them to be all the same size. I have lots of jars in my craft room but when I dragged them out they looked like they were only fit for a jumble sale. I was going to make 3 different ones for this post, but this weekend just kind of disappeared!! So it's just the one today.


I used the Stampendous "Snowy Postcard" for the front topper for this jar. It was layered up with ovals. Before sticking onto the front of the jar I made a lace edged band to fit round the jar. 


This was punched using one of the crafty edger punches. To give it more of a vintage feel I sponged the edges softly with brown ink and then added a strip of patterned paper and some organza ribbon.

For the top of the jar I made a round topper with the same stamp. Now all that is left to do is to fill the jars with jelly beans or dolly mixtures. I will do that at the last minute just to prevent the temptation of a certain person helping themselves!!


I have since added a bit of glitter on both toppers to give a bit of festive sparkle. I have five of these to make and each one will be different and while I am at it I am making an extra topper to use on a matching Christmas card. Well, that's the plan!!
I hope all your Christmas preparations are going to plan. When I suggested to my family that perhaps someone else could cook the Christmas dinner this year, there was a very long silence!! Never mind, us Mum's always seem to get there in the end.
Siobhan x

Wednesday, 5 December 2012

Woodware - Sketch Challenge

I am starting to panic a bit about Christmas...I like to be organised and when I am not it tends to stress me. Sad but true. So in between making my Christmas cards I have about ten birthdays to make cards for. For this sketch challenge I decided to kill two birds with one stone as it were and use this card for my Auntie in Ireland. So here is the sketch:
 

And here is my birthday card :


This gorgeous bird is from the new Stampendous October 2012 catalogue (CRR158 Cling Nestled Bird). As soon as I saw it I knew I had to have it for my bird collection. I have coloured the main image with Polychromos pencils to keep it quite natural looking. Then I splattered a fine spray mica paint across the piece by flicking a loaded paintbrush. The embossed script along the base of the background another Stampendous set CRS5029  Songbird - Jumbo Cling. I bought both of these from The Stamp Man.


My auntie loves flowers so I added a few flowers punched from pale pink card. I think it is a pretty card. I hope she likes it as it cost a blooming fortune to post to Ireland!!
I hope your Christmas preparations are going better than mine....never mind I am sure I will get there in the end. 
Remember there is a voucher up for grabs if you want to join is for this sketch challenge. Just check out the Woodware blog for details.
Siobhan x
 

Thursday, 29 November 2012

Woodware - Christmas Gifts

This week's challenge is to come up with a Christmas Gift idea. I always have great intentions to make more gifts at Christmas, but never actually get round to it. So this year I am determined to make some stationary boxes with a selection of hand made cards to give to non-crafting friends. My friend Liz led a few workshops making these, back in the days of Stampaholics. They went down well but I never got the chance to join the workshop. I had always intended to have a go so here it is 3 years later!! The template and instructions can be found on Splitcoast Stampers and is really easy to make. The key really is to use 12 x 12 paper that is quite thick but you could use card stock and stick decorative panels on top. So here it is ..... my stationary box.

 This is the completed box. The flower was made from several layers of large daisies punched from text paper coloured and scrunched up.
Then open the box : 


The front folds down to reveal the compartments for your handmade cards and tags. The main compartment will take 6x6 inch cards.

 I also made a little address book and an envelope to hold postage stamps. 


These 3x3 inch gift cards fit perfectly into one of the front pockets.


Then I made some luggage label style tags to go in the other front compartment. I thought these would look good on parcels wrapped with brown paper and tied with raffia. In fact I will gift wrap this gift in that way to suggest that idea to my friend.
Then I made six square 6x6 cards in a similar theme. The intended recipient is a bit of a nature lover so I thought she would like these.


All the stamps used in the cards are by Stampendous. They are all images I use time and time again. The next stationary box I make is for someone who likes cute and girly things. Really, the possibilities are endless.
There have been some really inspiring projects this week on the Woodware blog ranging from a gift bag, a muffin tin advent calender and a Noel Christmas decoration. Be sure to pop over for a look!!
I am looking forward to a quiet weekend before the madness that is Christmas completely takes over!! 
Siobhan x

Friday, 23 November 2012

Woodware - Black and White Christmas

There have been some gorgeous samples on the Woodware blog this week. I don't do much black and white normally so this was a bit hard for me!! However after seeing what my fellow DT members have done I could be converted.
Well here is my effort. It is an easel card and features an old but still current Stampendous stamp of the three wise men. There is so much detail in this image that I felt it would work well for this theme.


 I apologise for the photos, they are not great. I am struggling to get daylight just now. It's darkish in the morning leaving for work and completely dark by the time I get home!!.
The borders on the main card were stamped using the border stamp from a clear Stampendous set called "Damask Chair". It is such a lovely border which I use for lots of things and I thought it worked well here.
The black matting layers are black glitter card for a bit of Christmas bling (although it doesn't show up in this photo!!)


 And of course I had to add a few pearls. Woodware sell strips of pearls in lovely scroll type patterns which are great for adding that little something extra!!
Be sure to check out what the other girls have made this week for loads of inspiration.
Hope you have a great weekend!!
Siobhan x


Thursday, 22 November 2012

The Stamp Man - Emboss it!!

This month at the Stamp Man we were set an embossing challenge. Any type of embossing so I went with heat embossing with powders for this Christmas card.
I have used normal powders and some Frantage powders to hopefully give this card the wow factor!!


 The main image is the gorgeous Stampendous "Snowy Postcard" Stamped twice onto white card using coffee Archival ink then colour added with Distress inks. The edges of the postcard were "Frantaged" using several colours of the aged and shabby powders.


The background was made using blended Distress Inks onto thick white card then distressed and layers of stamping. I then embossed white snowflakes (free from last month's Craft Stamper" magazine. The border at the top is from Stampendous and comes from the jumbo cling Hollyhocks set. 
To finish off I die cut a Tim Holtz reindeer from mount board, coloured and stamped with Distress inks. Then it was triple embossed with clear powder. And then finally more frantage powders around the background edges.
I really like this, so will probably give it to my husband, that way I get to keep it!!
You have until the end of the month to enter the Stamp Man challenge and have a chance of winning a gift voucher......so what are you waiting for!! I enjoyed this challenge and got another Christmas card for my box!!
Siobhan x
 

Saturday, 17 November 2012

Woodware - Cute Christmas

I am last up this week for a "Cute Christmas" at Woodware . I don't do a lot of cute stuff although it is nice for a change. But then the panic set in!!! I don't have many cute Christmas stamps that are stocked by Woodware. Then I remembered that somewhere I had this cute little Stampendous raccoon "Rocco Skate". The card took less time to make than it took me to find the stamp!! Never mind, such is life as a crafter!!
So here it is, my cute Christmas card:


The trees came from a clear Stampendous set "Birch Buddies". As my sewing machine is out at the moment I did some stitching around the sentiment and the background . The background was stamped with a tone on tone look using Jane's Woodware design "Faithful and Joyful" background stamp. I used double sided adhesive film on white card and glittered the edges with fine pastel blue glitter for the matting layer. That leaves a sticky centre to pop the main panel on!!


The punched border was using the Crafty Edger Bling Bling cassette. A few pearls and a bit of aqua organza ribbon to finish off. I know someone who will like this card!! I will keep it for her.
Hope you have a good weekend. I better seriously start my Christmas shopping. Just looked out my craft room window to see a flock of Waxwings in our rowan tree. Such lovely birds but my husband always moans that they leave such a mess behind!!
Siobhan x
Related Posts Plugin for WordPress, Blogger...