Friday 19 December 2014

Woodware - Why Thank You

This week at Woodware we are making Thank You cards. Well it's good to have a break from making Christmas cards. I definitely need to start earlier next year .... but I say that every year and never do!!


I have used two of my favourite rubber stamping techniques, resist and distress. The lovely grasses are a Woodware set of clear stamps designed by Jane Gill. I stamped these onto a 14 inch square of white card and embossed with clear powder. Then I blended Distress inks over the top. I added some text stamping and some water splattering.


The sentiment was stamped with gold ink onto a piece of parchment paper or vellum. I embossed with gold powder then I tore the strip to size and wrapped around the stamped panel.

Hope you all enjoy the Christmas period. And of course the final of Strictly Come Dancing on Saturday. My hubby is cooking so I will be having a few gin and tonics for the final!!

Siobhan x

Saturday 13 December 2014

Woodware - Inchies

Well that's another hectic week gone by in a flash. So it was quite nice to sit in my craft room for an evening for some time out!! This week at Woodware we are using "inchies". I have done a few cards in the past with inchies and I like the whole idea. of putting together small images to make a sort of collage effect.
As I am still short of Christmas cards this year I decided to make a Christmas card with mine.


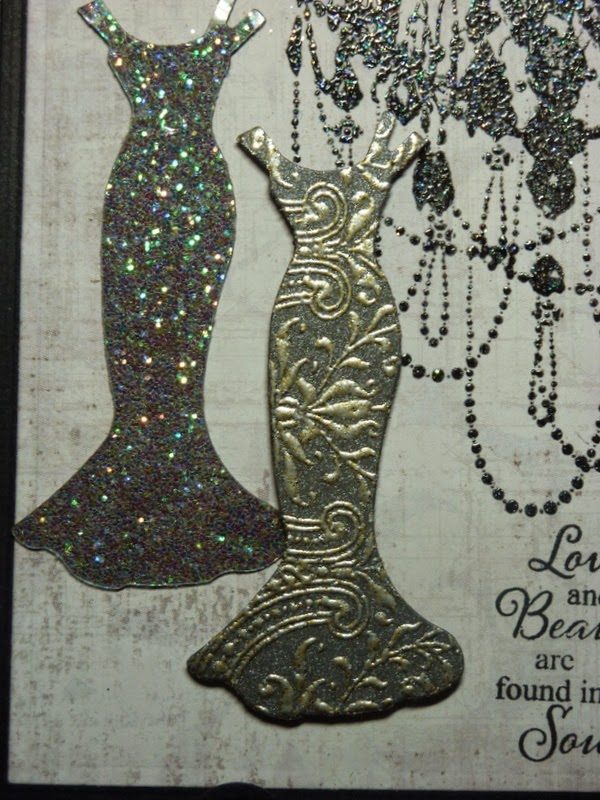
All the images I used are Stampendous. I stamped the images onto scraps of card first. Some I embossed with gold powder. Then I used the 1 inch square punch to cut out the portion of the image I wanted. I wanted to use mine as diamonds just to change things up a bit. I then layered them onto green squares and assembled as shown:


To finish off I used some die cut corners and some pearls. Then a die-cut flower just as a final embellishment. 
I hope you are all coping with the stresses of the run-up to Christmas. My Irish Christmas parcel is ready to go this morning and this afternoon I am putting up the tree. Last year I had a melt-down because I could not get the tree to stand up straight. I nearly chucked the whole lot away!! I am hoping for a less stressful time this time!!
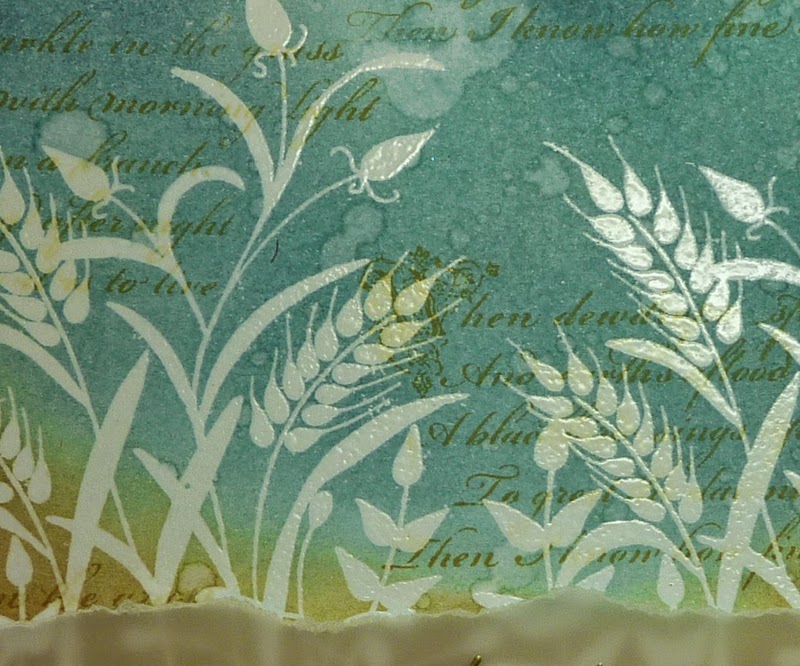
While I had the green and gold out I made a batch of quick cards with a lovely Penny Black stamp.


I had already stamped out the images previously ...... something I should do more of!!
Have a good week and try to stay calm!! My mantra for this week!!

Siobhan x

Monday 1 December 2014

Woodware - Sketch Challenge No 40

Well it's nice to be back. It seems ages since I last posted anything. I was in Ireland for 3 weeks helping look after my Dad. He had to have a big operation to remove a blockage from his bowel and now has a stoma and bag. He was doing great to start with but there were a few problems along the way and he was quite poorly while I was over. Thankfully he seems to be on the road to recovery now and getting stronger day by day.
While I was over I was fascinated by the variety of toadstools I saw when out walking my Dad's little dog Trixie.
Here are a few of my favourite ones.


And here is Trixie. 


Firstly I would like to thank the very talented Kim Reygate for filling in for me while I was away. As always her cards are lovely and very individual. 
Back to this week's Woodware challenge. It is a sketch challenge. Here is the sketch: 

So a very simple sketch this week. I decided to have a rest from Christmas card and chose a Stampendous set SSC160 Changito Dos. These cheeky little monkeys are great for cards for men and boys.

And here is my card.


The leaf punch is great for jungle scenes. The photo corner was made using a scallop square punch. I cut it diagonally in half and then used a plain square punch to cut a bit out of the middle.


A quick card to make as all the stamps are in the set. 
For other ideas on this sketch challenge, go to the Woodware blog to see what the other girls do.
Have a good week!! It is a bit scary that this is the beginning of December already. 
Siobhan x

Saturday 1 November 2014

Woodware - Sketch Challenge 39

This week is another sketch challenge at Woodware. This is the sketch we were given to work with :

I have rotated the design 90 degrees and used some snowflakes for my interpretation of this week's challenge. 


I stamped some large snowflakes (these are by Stampendous and you can buy the matching dies) with Versamark and embossed with white powder. I stamped them in the position of the circles on the sketch.
I then blended over some soft pink and blue dye inks, spritzed with some water to distress a little. Then I splattered some pearl mica paint for a snow flurry effect.
Now I don't have the dies that matched the stamps (yet!!). So I used some other dies I had to cut the 3 snowflakes on the white glitter card. I used some white mesh ribbon behind the snowflakes to give a lovely cob web effect.


Once assembled I added some small and medium glitter domes to embellish. 

I will be away when this post appears. My Dad has had a big operation recently and I am taking a couple of weeks off work to go over to Ireland to help look after him until he gets back to normal. I am not sure yet who on the Woodware team are going to look after my postings while I am away. If it is the lovely Kim Reygate then you are in for a treat as her cards are always lovely. 
I will be back on my blog by the 3rd week of November. Then hopefully I will get a wiggle on and get my own Christmas cards made.
Siobhan x

Monday 20 October 2014

WOODWARE - White Christmas

This weeks challenge from Woodware is "White Christmas". I decided to make a button tree. I have made these before but usually with lots of colours. So here is a white one. 


These are so easy and such fun to make. Before cutting out my triangle of card I covered it with some double sided adhesive film. Peel off the top sheet and press your embellishments onto the sticky surface. I have used a mixture of buttons, pearls, snow domes, gems and nail heads. Then cover the whole thing with a nice fine glitter and you have a lovely sparkly tree. I used multi-crystal glitter from Stampendous. It has speckles of other colours in it which really catch the light.


I used some torn paper to create some drifting snow. This was edges with a glue pen and glitter as was the sentiment. So get raiding the button tin to make some great Christmas trees.
I am first up this week so be sure to pop back to the Woodware blog to see what the other girls come up with. At this rate I will have all my Christmas cards done by the end of November. Now that will be a first!!
See you next week.
Siobhan x

Tuesday 14 October 2014

Woodware - Traditional Christmas

This week's Woodware challenge is "Traditional Christmas". What can be more traditional than decorating the Christmas tree. Stampendous have a lovely collection of House-Mice Designs designed by Ellen Jareckie. So I decided to uses these cute little guys decorating their tree but keep it more traditional with the colours.


There is not really much to explain with this card. I coloured in with brush markers and added a glittery finish to the berries and bows with a Sakura stardust pen. Sadly it does not show up well in the photo. I also added some red and gold nail heads.


I hope you enjoy the inspiration this week on the Woodware blog. Have a good week and keep crafting!! 
Siobhan x

Wednesday 8 October 2014

WOODWARE - Christmas Decorations

At Woodware this week our challenge is to make a Christmas decoration. The decoration I have made was inspired by ones I saw years ago at a craft fair using ribbon. I tried it with strips of folded paper, a polystyrene ball or cone shape and some dressmaker's pins. I was quite pleased with the result.


First I chose some paper. This came from a new Christmas pad by Craftwork Cards. I usually try to pick something with a small pattern as this tends to work best.


I cut some strips of paper in 2 sizes. You need about 12 smaller strips for the top of the cone and the same for the base (2.5 x 5cm). Then for the middle section you need to cut slightly bigger pieces (3 x 6cm). The rule of thumb is that the length is twice the width.

Next you need to fold your strips in half. Then fold the two bottom corner points to the top centre fold. So far so good!!


Now take four smaller pieces to cover the bottom of the polystyrene ball making sure the points of the triangles all meet at the centre of the base of your shaped ball or cone.


See how the pins are placed at the base of each triangle. The next layer is using 8 pieces of the small strips. Think of tiles on a roof, you are overlapping each join of the previous layer. I always pin opposite pieces on both sides then fill in between those with the remaining 4 pieces.


As the circumference of the ball is now getting bigger I switch to the bigger strips for the next few layers. I did four rows this way and then for the last 2 layers I went back to the smaller pieces.


To cover the top I punched a circle of paper and added a loop of ribbon and some punched or die-cut foliage to finish off.


You can add glitter if you wish and I like to spray mine with a Christmas room fragrance for that finishing touch. 
The only difficult thing about making these pine cone baubles is putting the pins in so I use a thimble to save my fingers!!
I hope you are enjoying the inspiration this week on the Woodware blog, I know I am.
Have a good week and enjoy your crafting!!

Siobhan x

Monday 6 October 2014

Craft Retreat in Beamsley

A couple of friends have asked to see what we did at the Beamsley Babes retreat this time. September is usually "Do your own thing". And usually I make some Christmas cards for my Dad. But this time I thought I would make a start on my own. I recently bought one of Tim Holtz's blueprints range and wanted to use all 4 in the set to justify having bought it in the first place!!
I really enjoyed using them as they are not my usual sort of Christmas stamps. And here is what I made.


So these are the stamps. My friend Liz had the snowman with dies set so I was able to borrow the dies to die-cut my snowman.


My next choice was the toy soldier. I thought this was my least favourite but I really enjoyed using it.


Next up was the Christmas tree and I did a few variations on this one.


The punched green strip was a new Woodware punch I had just been given. You can set it to punch just an edge or a double sided strip which I thought was a great idea!!
Then my final image was the snowflake.


The snowflakes in the background were embossed with a fine crystal glitter powder but sadly that doesn't show up in the photo.
Janet also lent me another Tim Holtz stamp of a Santa and this is the card I made with him:


Janet also had a little extra project to try of an advent calendar made from a small block of wood. This was a lovely fun thing to make and I was quite chuffed when I finished it.


The numbered tiles just flick over towards the bell as you count down to Christmas. 


So thanks Janet for the idea.They all looked quite different as people put their own twist on it.
Talking of inspiration, my friend Liz made me a lovely box. The image was a stamp I had previously given her and she had used pyrography onto the wooden box. How cool is that!!


We all had a great weekend. It just goes far too quickly. But we always come home with lots of ideas and things we want to try.
Thanks again Linda for being such a good friend and crafting buddy ... it would not be the same without you.
Siobhan xx

Thursday 2 October 2014

Woodware - Sketch Challenge 38

This week's Woodware challenge is another sketch. I have decided to stick to the Christmas theme as it is now October and I want to start filling my Christmas card list!!
This is the sketch :


And here is my interpretation :


 All the stamps are from Stampendous. The blended background was stamped with the snowflakes firstly with water to lift off ink then with inkpads. This helps create a nice layered background as a base. 


I then decided to make the centre piece my sentiment as it is such a lovely one. The snowman was coloured in then some glitter added.
If you go onto the Woodware blog you will be able to see some lovely samples for this challenge.
My good friend Linda and I had a really good time in Yorkshire for the Beamsley Babes retreat. We even managed to get some cards made. I will share them on my blog at the weekend. I am still unpacking the craft stuff!! Needless to say we managed a wee trip to Embsay Crafts near Skipton and bought some lovely new crafty goodies to play with. 
My most exciting purchase was a Gelli plate. I keep seeing all these amazing backgrounds made with a gelli plate and I can't wait to have a go with it. I think it will be great fun!!
Have a great weekend.
Siobhan xx


Monday 29 September 2014

Woodware - Christmas is Coming

As I say most years I am going to start making my Christmas cards early this year. This will be my third!! Christmas is Coming is the theme on the Woodware blog this week. 
I seem to be enjoying paper piecing at the moment so here is another Christmas Dove card:


This Woodware stamp is a favourite of mine. Very simple lines to cut out which make paper piecing easy.


The background is another Woodware stamp with a Christmas script montage. I have used it before. I stamped onto white card with white pigment ink and let it dry. Then I used 4 different Cat's Eyes in blues and purples to blend over the top. Then rub with kitchen towel and it appears. Soft and subtle....I think it's also known as ghosting.
I love this resist. 
When this appears on the blog I will be in Yorkshire with my friend Linda for our craft retreat. We have been going for about 3 years now. It is always a great weekend catching up with crafting friends. This is when I get my Dad's Christmas cards made!!
Remember to check out the Woodware blog for lots of Christmas inspiration!!
Hope you have a great weekend!!
Siobhan 

Friday 19 September 2014

Woodware and Crafty Makers and More - Ribbon, Lace and Pearls


This week Woodware are sponsoring Crafty Cardmakers and More. As their theme they have chosen the theme "Ribbon, Lace and Pearls".


So far this week every one on the team have gone with a Christmas theme. I don't think it was deliberate just a happy coincidence. The new Christmas stamps have recently been released so I think we have all been looking for an excuse to use them!!
I have gone with this lovely dove design.


I used papers from one of the Craft Work Cards pads. For the snowy background I splattered with a little white mica powder mixed with water. 


Then I added some lace, ribbon and pearls.


Well that's 2 Christmas cards so far for my box!!
It's been a busy week and thankfully it's nearly the weekend. Then next weekend I am off to Yorkshire with my friend Linda for a craft retreat. I better start getting organised!!! 
Hope you have a good weekend. 
Siobhan x

Monday 8 September 2014

WOODWARE - Crafty Edgers or Punches

This week at Woodware the team have been asked to use punches or crafty edges. I have gone with punches and in particular this evening dress punch. I was recently given it and have used it several times already. It is just perfect for making girly cards for any age group.


I also used a Stampendous chandelier stamp which I embossed with crystal powder for an extra bit of bling. The sparkly dress was punched from a piece of pewter metallic card covered with double sided film. All you need to do then is peel off the backing and cover with crystal glitter and you have a fabulous sparkly dress. The second dress was punched from the same card. I stamped a nice patterned stamp on top and embossed with pewter embossing powder.


Then I finished off with a couple of punched flowers.
I am first up this week so I am looking forward to seeing what the other girls come up with. 
I met up with Dorothy and Judith yesterday. They were in Perth for a trade show. It was lovely to see them both and catch up. I also got to see all the lovely new stamps and stencils and other products. 
Siobhan x

Tuesday 2 September 2014

Woodware - Craft Canvas

This weeks challenge at Woodware was to use Craft Canvas. This great product is a canvas that acts like paper. You can stamp it, die-cut it, stitch it, stencil on it ........ and the list goes on. There is lots of information about it on the Woodware blog.
I knew early last week what I was going to do with mine but sadly things didn't work out as planned. Our wee Westie Rory become ill on Tuesday and steadily declined over the next few days. We had a pretty stressful few days but by Thursday evening we had to make the sad decision to let him go. Rory was put to sleep late Thursday night. So between exhaustion and grief my head has not been in the right place and crafting was the last thing I wanted to do. He was such a character and I know we will miss him so much. So apologies for the rush job I ended up with for my DT project.


I had seen a really nice project on a blog I follow Very Berry Handmade. Ali is a very talented Mum who designs lots of lovely sewing projects. Her mini art wrap caught my eye and this is what I wanted to use my canvas for. I am trying to get into zentangling and I thought this would be the perfect place to keep all the pens and pencils and an A6 blank book to draw in. So the idea was to zentangle the canvas before making up the wrap. Now that I have made one I will make one properly as it is a great idea. Ali's tutorial has step-by-stem photos for each step and is so easy to follow. 

So I will not go into detail of how to make this, just click on the link and follow Ali's instructions.
I joined two piece of canvas and a piece of fabric for the front of the wrap


The ties were added before stitching the right hand side together.


This was the inside of the wrap with lots of pockets sewn in:


And here is the finished project :


And from the back :


Then all I had to do was fill it with my fine black pens and pencils and a little A6 blank art note book.


All ready to chuck in my bag so I can zentangle anywhere!! 


And here, as they say, is one I did earlier!!

Please forgive the wonky stitching, but my next attempt will be so much better!!
Have a good week.

Siobhan x

Related Posts Plugin for WordPress, Blogger...