Friday, 29 November 2013

Woodware - Quick Christmas

This week at Woodware our theme is "Quick Christmas". Which is rather appropriate as I left this to the last minute and it was literally a 10 minute card.
I chose the rather beautiful Stampendous cling stamp CRP213 Oh Christmas Tree for my quick card.


I simply stamped with embossing ink onto white card stock and embossed with a detail white powder. This makes sure you can make out the detail of the writing. Then with dye inks I blended over 3 shades of blue from light to dark. This gives a nice night sky effect. Then a few splatters of water to look like falling snow and its done.
Some simple layering and a bit of ribbon and it's done. 


I am going to try this with some other colours like greens and perhaps some soft pinks and lilacs. 
Check out the Woodware blog for some other quick Christmas card ideas.
Have a good weekend everyone. I for one will be starting the Christmas shopping as I have not started yet!!
See you next week.

Monday, 18 November 2013

Woodware - Sketch Challenge 28

Time for the next sketch challenge over at Woodware this week. This will be number 28. It is a nice simple sketch and as it involved two ovals I decided to incorporate two current favourite Stampendous stamps.


The two Stampendous stamps are Snowy Postcard and Train Postcard. Then sentiment is also by Stampendous and I really like the words. 


I just used the inner oval from each of the two images and stamped them onto card that I pre- blended some blue and brown inks for a quick background.


The background for the ovals was coloured with soft blue and brown inks, softly blended. then I stamped with a pine sprig (also Stampendous). I stamped the first layer with brown ink then over stamped with gold Encore pigment ink and embossed with gold powder.
I quite like the old fashioned, nostalgic feel of this card. 


Here are a couple of close-ups to see the images in more detail.


I am first to post this week so it will be fun to see what the other girls come up with on the Woodware blog!!


Tuesday, 12 November 2013

Woodware - Paper Piecing

We are pleased to be playing along with the Crafty Card Makers this week, the challenge will be open on their blog for two weeks. If you would like to play along with us please check the Crafty Card Maker rules then use the link on the Crafty Card Makers Blog to add your card or if you are not a blogger yet you can e-mail your card to me as usual Dorothy@woodware.co.uk  and I will post it and add it to the Crafty Card Makers Blog


This week's challenge at Woodware is paper piecing. This is not something I do much of as I hate cutting out fiddly things. So I chose an easy design to paper piece. This Woodware dove lends itself perfectly to this technique. I chose some soft blue and brown winter background papers.


If you are careful you can get several doves from one lot of stamped papers, so quite good if you are batching your cards.


As you can see I added a few pearls and some faux stitching on the background circle. A die cut or punched snowflake finishes off the card.
Remember if you join in you could win a Woodware voucher. For lots of other ideas on paper piecing be sure to check out the Woodware blog this week.
Well I am back to work today after a great trip to London with my sister. Now I need to get some serious batching done to get my own Christmas cards made!! Every year I say I will start earlier but never do!!
Have a good week. 
Siobhan x

Wednesday, 6 November 2013

Woodware - Treasured Memories

Our challenge this week at Woodware was set by Christina from A Maze of Memories. As well as setting the theme she has also a tutorial on her blog on how to create a chalkboard effect. I must make time to have a go at that, it looks really effective.
I have been having an on-going clear out over the past few weeks. I keep coming across little things my kids have given me over the years and other mementos from loved ones past and present. So when I so this week's theme that gave me the idea to decorate a box to keep them in.

My box started life as an A4 Manila document box. It was fine as it was but a bit utilitarian. So I gave it a makeover. I painted the whole box with gesso first to prime it. Then a couple of coats of acrylic paint. I also sponged a soft pink on the lid to soften the effect.


On the top of the lid I stamped a panel of paper using various Stampendous stamps. I used a scroll stamp (also Stampendous) around the edges to frame it and embossed it in gold. I then finished off with some frantage powders round the edges of the lid.


The photos aren't great. I was starting to get dark. I am quite pleased with my altered box. And it's nice to have a proper place to store all those little memories.


Talking of memories. My sister and I are meeting up in London on Thursday. It's her 50th birthday soon so we are going to celebrate it together by having a little trip together. So no doubt we will create some nice new memories.
Be sure to check out the Woodware blog for lots of great ideas and inspiration.
Keep warm and keep crafting.
Siobhan x

Thursday, 31 October 2013

Woodware - Travel

This week at Woodware our theme is travel. I recently got this gorgeous Stampendous stamp of the steam train. Although it is in this year's Christmas catalogue, you can use it any time of year. So I thought it would fit the travel theme perfectly.


CRR187 Train Postcard

I went with an autumn theme and used a leaf stamp and some travel post marks from a Stampendous clear set of travel stamps I have.


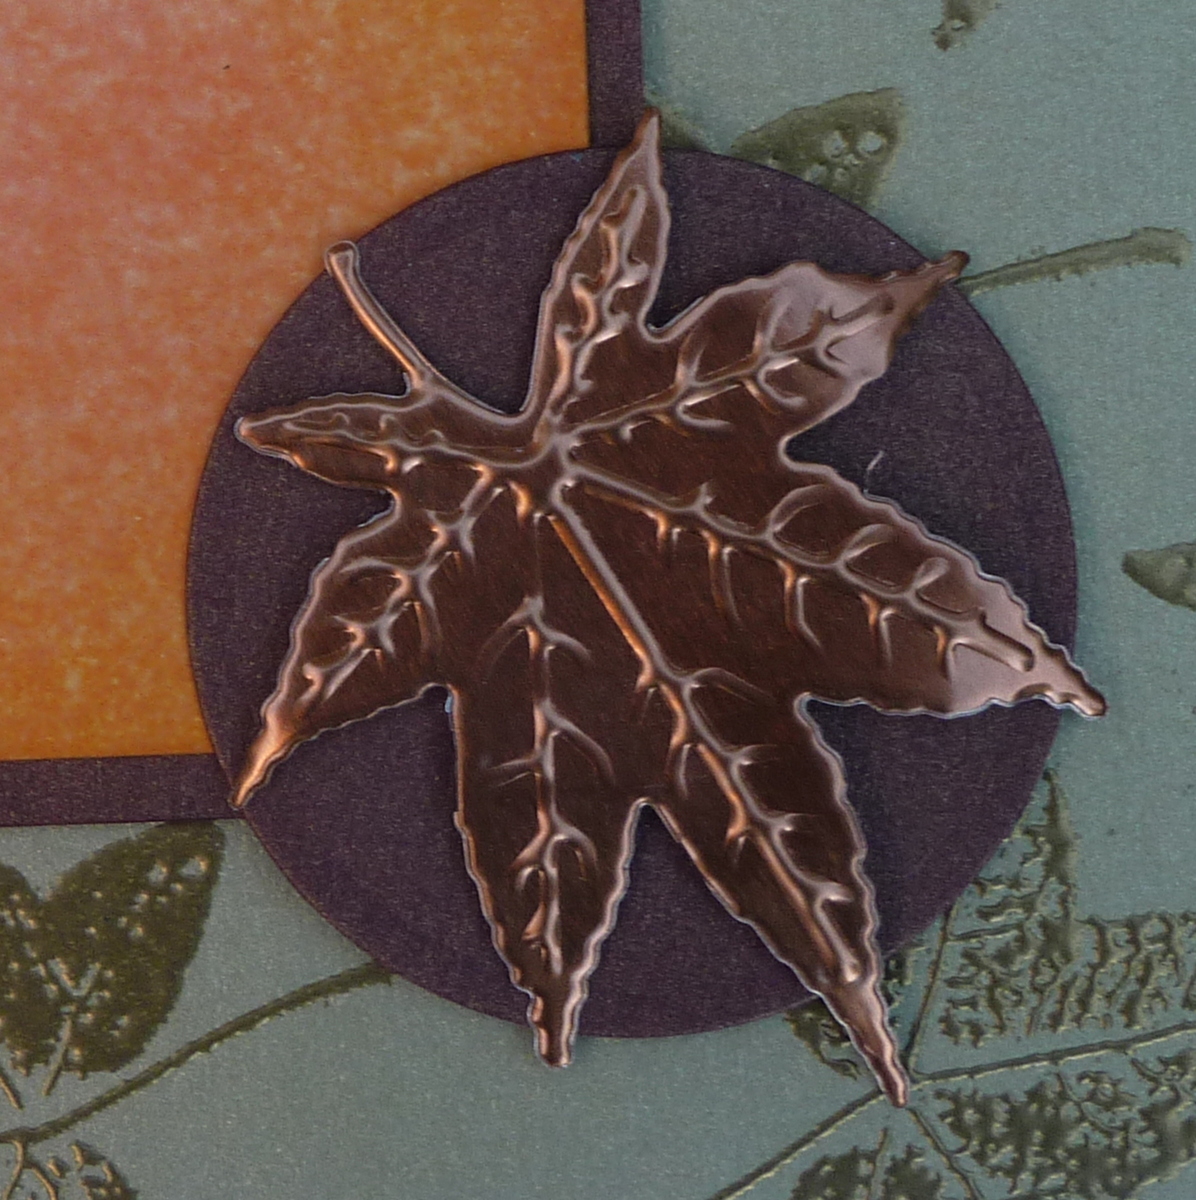
To cover the holly part of the image I die cut a leaf from Woodware copper foil. I love this product. It makes your die-cuts look really special. I also cut a couple of fancy corners to finish off.
The travel quote is another Stampendous cling, and one I have used before. 


I think this stamp is a great one for masculine cards as well as Christmas and travel. There are lots of other great ideas on the Woodware blog this week. Pam our DT member from the States did a great card using a Stampendous cling motorbike. I will be definitely adding that to my collection!!
Siobhan x

Friday, 25 October 2013

Woodware - Circles

Over on the Woodware blog this week there have been some great ideas using circles. All the team have come up with completely different ideas. I made another Christmas card this week using circles. It is always fun trying to come up different ways of using a set of stamps. So here is my take on the circle theme:


 I used a set of clear Stampendous stamps for most of the images, although the little cottage was a separate Stampendous cling stamp but goes really well with the first set. I stamped all the images in black ink then punched out the circles. After colouring in I used a glue pen to outline each circle and covered in glitter.


Family and friends are the circles that mean most to us and so this was the idea behind the card. I think I might make a few of these!!
It was a lovely day here today. The trees are looking stunning in their autumn colours. I must try and get some photos before they loose their leaves. 
Hope you have a good weekend!!
Siobhan

Saturday, 19 October 2013

Woodware - Sketch 27

I am last up this week at Woodware for our latest sketch challenge. This is the sketch we were given:


I decided to go with a Christmas theme for my take on this sketch. And both stamps I have used are new. The lovely background script is a new Woodware stamp. The tree is from Stampendous and I just love tree stamps (So I just had to have this one!!)


The Woodware Christmas script was stamped and embossed in gold. For the trees I sponged a background first before stamping the trees. I didn't think the card needed much else so I just stamped and embossed a border down one side of the background paper and added some organza ribbon and a bow.


I know these are both stamps that will get well used this year. I hope to make a batch of cards this weekend to start my own Christmas box. If I have any peace between grocery shopping, cleaning the house, dogs and going looking at Wedding dresses. Catriona and I are going for her first look for THE DRESS this Sunday!!! No doubt there will be a little tear when I see my baby in a wedding dress!! 

Have a good weekend whatever you are up to!!

Siobhan x

Tuesday, 8 October 2013

Woodware - Monochrome Christmas

Well folks this week at Woodware we were set with a retailer challenge by Janet from Craft Range in Burnley Lancashire. She wanted people to share their monochromatic Christmas ideas. So these are actually the first two Christmas cards I have made this year. As always I seem to be way behind everyone else!!
I chose this lovely new Woodware single stamp JGS176 Nordic Dove and Branch designed by Jane Gill. I love the simplicity if the design and the fact that it lends itself to a variety of techniques.
The first sample is using a resist :


I chose several shades of blue pigment cat's eye ink pads to go over my resist.


I then finished with a light blue dye ink over the top with then allowed me to splatter some water to make it look a little more distressed.

My second sample is more a vintage look.


I stamped the dove twice, once onto white card and the second on to Kraft card and used a paper piecing technique. I added a little colour with a paint brush to highlight the swirls on the dove.
These were two very simple cards to batch and I hope I have given you a couple of ideas of how to use this lovely stamp.
I am sure there will be lots of other lovely sample on the Woodware blog this week, so be sure to stop by and check them out.

Have a great week!!
Siobhan x

Tuesday, 1 October 2013

Woodware - Alter it or Recycle it!!

This week our Woodware challenge is to either alter something or re-cycle something. I had recently bought some calendar tabs with the intention of making some desk calendars for Christmas gifts. So I thought I would make a start with one for this week's challenge.
I have an old chipboard book that I have never used and as the pages are nice and thick, they make a great base for the calendar.
I used the page as a template to cut out a piece of gold card for the background. This was stamped and embossed with gold. The stamp is an old Stampendous leaf border.


I also ran the gold pad all round the edges and embossed that as well to finish off the raw edge. I then chose a stamp for my main image and stamped it over a sponged setting sun. A little matting and layering and your done! 
I have an easel die which allows you to stand things up, but you can quite easily make your own stand or hanger if you prefer.


Normally I would cover the back with a nice piece of paper to finish off....especially in this case when there are holes in the back!!
Hope this has given you some ideas for quick Christmas presents. And good for fund raising sales of work.
I was down at Port Sunlight this weekend with some good friends for the Happy Stampers show. Although I was feeling a bit under the weather I really enjoyed it. Bought some lovely new things, saw some great demos and also met up with a couple of other friends. Now I am cuddled up on the sofa with a cosy blanket with a hot toddy writing my blog post. 
Linda in the middle of Janet and Liz outside Hulme Hall in Port Sunlight

Liz and Lynne outside the hall. 


Wednesday, 25 September 2013

Woodware - Magic Stamp

This week we our Woodware challenge was to use Magic Foam. Now this is something I did stock in my shop but never really used. It comprises of a block of blue foam that you heat for around 15 seconds with a heat gun then press on to a textured surface. The foam will take up the impression and you can then ink it up and use it as a stamp. The cool thing is, that when you are fed up with the pattern you simply re-heat it to make a new impression. Hence "Magic Foam". Debs did a great card yesterday where she pressed her foam onto some fun flower buttons. And you end up with a negative impression of your textured surface.
I used my foam on an embossing folder. The one I settled for to make my card was of a bamboo design. And an oriental theme to finish off my card.


I used the same embossing folder for part of the background. And I chose nice soft colours to make it suitable for a thinking of you card.
Be sure to check out the Woodware blog to see what the other girls have created using their Magic Foam!!
Well I am off to Happy Stampers show at Port Sunlight at the weekend with some friends. I am hoping to come back with some new goodies and lots of inspiration. I am also looking forward to meeting up with some friends down there....so lots to look forward too!! 
Siobhan x

Thursday, 19 September 2013

Woodware - Winged Things

This week at Woodware we have been given "Winged Things" as our challenge brief. Just as well I checked last night because I had gone down a whole different path - I thought we we using a tic tack toe grid. So I had to abandon my first project and think of something quick and easy. The Great British Bake Off was due in 20 mins so I literally made a 10 min card.
The background stamping was done with parts of the lovely Stampendous song bird  stamp and then I stamped the main image in black to make it pop.


So no frills or complicated processes ... just simple stamping onto a blended dye ink background. But as is often the case, less is more.
My son Paul is home from his travels in Canada and Alfie our Schnauzer just loves being with him so I thought I would share this photo with you!!


Nearly the weekend, thank goodness. Have a good one!!
Siobhan x 
 
I

Friday, 13 September 2013

Woodware - Sketch Challenge 26

Time for another sketch challenge over at Woodware this week. There have been some lovely samples so far and they have certainly given me a few ideas!!
This is our sketch : 
 

I have been playing with my stencils this week. As Autumn is fast approaching it reminded me that I had a lovely Dreamweaver stencil of a branch of maple leaves.
I wanted to use the stencil on a darkish blended background so I used Matt Black Embossing paste. I also used the new Dreamweaver pasting tool to spread my paste and it worked an absolute treat. When I did workshops using paste I found several of the ladies struggled with a palette knife. But this new tool is so easy. It is basically a long semi-circle of metal, easy to grip and wide enough to paste even large stencils in one or two sweeps!!


Once the paste dried I popped the stencil back on and sponged on some embossing ink to make the pasted leaves sticky. Then I brushed on several colours of mica powders (I used Pearl-ex but any mica powder will work just fine). A quick spritz of water helps seal the powder.

I layered up with some bronze card and the gold panel was stamped with leaves in gold and embossed with gold powder.

To finish of I die-cut and embossed a leaf from copper foil sheet. This is a great product that Woodware sell. It is nice and thick and so retains it's shape when die-cut. It also comes in gold and silver.


 I didn't put a sentiment on as I like to have a stock of blank cards that would do for sever occasions!!
Have a good weekend, although the weather is not meant to be good ... at least it's an excuse to get some time crafting!!
Siobhan x

Saturday, 7 September 2013

Woodware - Layers set by Scrappy Jen of Wear Crafts

It seems ages since I last wrote on my blog. Thanks again to the lovely Kim Reygate who took my place on the Woodware DT during August so I could go away and not fret about deadlines!! As always her cards are just stunning.
So for my first week back we are using layers in our creations. I made a tag this week using layers of stencilling and stamping to build up my layers.
Here is the background :


 I blended dye inks as a base, added a little water distress then sponged through a couple of Dreamweaver stencils. I then added a bit of script and finally some scroll stamping which I embossed with Stampendous Frantage powder "Aged Aqua". I like to create my own backgrounds so that everything works together. Gone are the days when I used to search through my stash for just the right piece of background paper!!
Now for the fun bit. I just recently got this lovely Dreamweaver stencil of the cockerel weather vane and wanted to keep him quite rustic.

 
I then remembered I had a nice travel set of words by Stampendous that would fit the bill (if you would pardon the pun)


 A few screw brads and a little compass finish off my tag. The compass was silver so I just embossed it with gold to fit in better.
I am sure you will get loads of layering ideas this week if you check out the Woodware blog. Everyone has done something a bit different!!
See you next time for the next sketch challenge.

Friday, 2 August 2013

Woodware - Crafty Card Makers Challenge


We are back this week with another challenge with Crafty Cardmakers


So jump over and take a look at what they have on show to inspire you!
This is a fun challenge which you should all try at home. It’s 1 – 2 – 3, use 1 stamp, 2 pieces of patterned paper and 3 embellishments.

Apologies again folks for my late post. I have been having computer problems. My computer which I inherited from my daughter has been on it's last legs for sometime. Last night it kept crashing and after a tirade of verbal abuse, which did no good whatsoever, I gave up and went to bed. Fingers crossed it seems to be behaving tonight so I will get this post finished before it changes it's mind!!

For my 1 -2 -3 challenge I used a much loved Stampendous stamp "Happy Couple" as my stamp. I layered it up with two patterned papers and my 3 embellishments were punched daisies, pearls and a bit of organza ribbon. 


I used a glue pen and some fine prisma glitter for the brides dress.


My daughter has set a date for her wedding in June 2015. So I seemed to be a little preoccupied with weddings at the moment. Presently I seem to be swaying between excitement and sheer panic at the amount of money that will have to be spent to have this special day!! At least we have nearly two years!! And on that note I have made macaroni cheese for tea tonight, best to start economising now!!
Thank goodness it's Friday. Next week I am off on my holidays so I will be having a month off the Woodware challenges. The very talented Kim Reygate is stepping in again to cover my absence so I hope you will drop by to see her fantastic projects.

Saturday, 27 July 2013

Woodware - Punches on Parade

I am last up this week at Woodware for our theme using punches. I have to admit I don't use a lot of punches in my cards so I ended up keeping it very simple. I was all set to sit down and create something a little more involved like a spray of summer flowers. Then my daughter phoned to ask if they could come up for a while that evening. She and her boyfriend Sean were just back from a week's holiday in Tunisia. So I thought she wanted to show us her holiday pictures. And I have to admit I was less than enthusiastic on the phone claiming I had a lot to do that night but sure they were welcome to come up for a wee while. Anyway it turned out they had got engaged when on holiday. So a couple of glasses of wine later I suddenly remembered I needed to get this card made as Dorothy (our team leader was going away) and needed stuff from us early.
So I literally made this card in about 20 minutes. Most people have circle punches or dies so these flowers are so quick and easy.


 Once punched out I just roughen up the edges with my scissor blade and sponge the edges with a darkish ink to give them a distressed look. Then I use a large ball embossing tool on a foam mat to give them a bit of a cup shape to make them stand out a bit.


I like to finish them off with some buttons and pearls. I quite like the rustic but contemporary feel to the flowers. I also added a few punched out leaves to the hand drawn stems.
Well it looks like it's going to be another cracking weekend. Hope it's a good one for you. I am now counting down the days to our holiday ... only two weeks to go!!!! Boy do I need this holiday!!
Siobhan x

Monday, 15 July 2013

Woodware - The Great Outdoors

Whoops!!! I am a little late posting this. I completely forgot last night that I was first up this week for Woodware. This week our theme is the "Great Outdoors". I was about to reach for my trusty Stampendous Tree Poem stamp when I thought I had better use something else instead. I have used that stamp several times recently and didn't think Dorothy, our team leader, would appreciate another version.
So I had a rake through my Dreamweaver stencils and found another tree!! This is called Cedar Tree. I love oriental style cards and haven't made any for a while.


The tree was stencil embossed by running it though my die cutting machine. Then I coloured it with pigment inks and stencil brushes. I also found another stencil of cranes that had a bamboo border and used the bamboo down the edge of my background paper. I blended a little Antique Linen Distress Ink over the top to help make it stand out more.

Here is the finished card.


To finish of I used an embossing folder on bronze card and wrapped some garden twine around. I couldn't find my rafia!! Then I found a chinese coin and used some beads to dangle off the ends.

 
Simple but effective!!
I have no idea what the other girls will come up with for this theme. Should be interesting!! Check them out at the Woodware blog.
Have a good week!!
Siobhan x

Tuesday, 9 July 2013

Woodware - Sketch 25

We are on to sketch 25 over at Woodware this week. How the time flies. When this appears on my blog I will still be in Ireland. I am visiting my Dad and sister and her family with my daughter Catriona. I am looking forward to a few days of doing very little. The weather is meant to be good!!! Work has been a bit full on since I got back from Vancouver and I am still very tired. So I am hoping to recharge my batteries and come back full of energy and ready to go again ..... wishful thinking on my part. I put all my current ails down to the menopause!!
Here is the sketch:


And here is my sketch challenge card. I killed two birds with one stone here as I was asked to make an engagement card for a couple soon to have their first baby. 


This Stampendous image is one of my favourites. I haven't used it for a while so high time it got an airing. I coloured the card stock first by blending Distress inks. The rest doesn't need any explaining. I stamped a script (also Stampendous) on the brown layer behind the birds.


I finished off with a simple punched flower embellishment and some pearls.
Hope you are having a good week. 
Siobhan x
Related Posts Plugin for WordPress, Blogger...