Thursday, 27 June 2013

Woodware - Cats and Dogs

I have often wondered where the saying "It's raining cats and dogs" comes from. Well there are plenty cats and a dog over at Woodware this week. I am really a dog person, having two myself. But when it comes down to doggy stamps I don't have many at all. So I have gone with this lovely cat stamp by Stampendous. Our DT member Pam has already used it this week in her lovely card!!
My offering is far simpler. I have made some book plates and a matching envelope. This very studious cat is just perfect for these.


 I made 6 of each colour and cut them out using a rectangular die to keep them all exactly the same size. I am trying to source some nice thick paper that is already gummed on the back. But for the moment I just used Lick'n'stick on the back so the recipient can stick them into a book.


 The little envelope was adapted from a template I use for a longer coin envelope. I cut it out of some scrapbook paper.


The fastener was simply a large brad positioned so the envelope flap can tuck under it to hold it in place.


 The same image was used on the front of the envelope.


Then just pop in the book plates along with a book shop gift card and you have a nice little gift.
Have a good weekend everyone. I am catching up with a friend on Saturday then it's into the garden hopefully to get some planting done. 
Siobhan xx 

Friday, 21 June 2013

Woodware - Sorry you are blue!

This week are theme for Woodware is "Sorry you are blue" . I think this week my catchphrase has been "Sorry I am tired!!" . I am back from a one week trip to Vancouver for a work related conference. Now I really enjoyed it, both the conference and getting to see my son who is currently out there. But every one of the four flights was delayed. We sat on the tarmac on the flight for Vancouver for over 4 hours while they fixed a temperature gauge. The flight back was also delayed over 4 hours as the PA system wasn't working!! So I was kind of shattered before I got there, then it was pretty full on for the week. So to cut a long story short this week has been about catching up with sleep and trying not to fall asleep at work!! 
Vancouver and Victoria are both beautiful cities and I hope to go back one day when I have more time to explore!! 
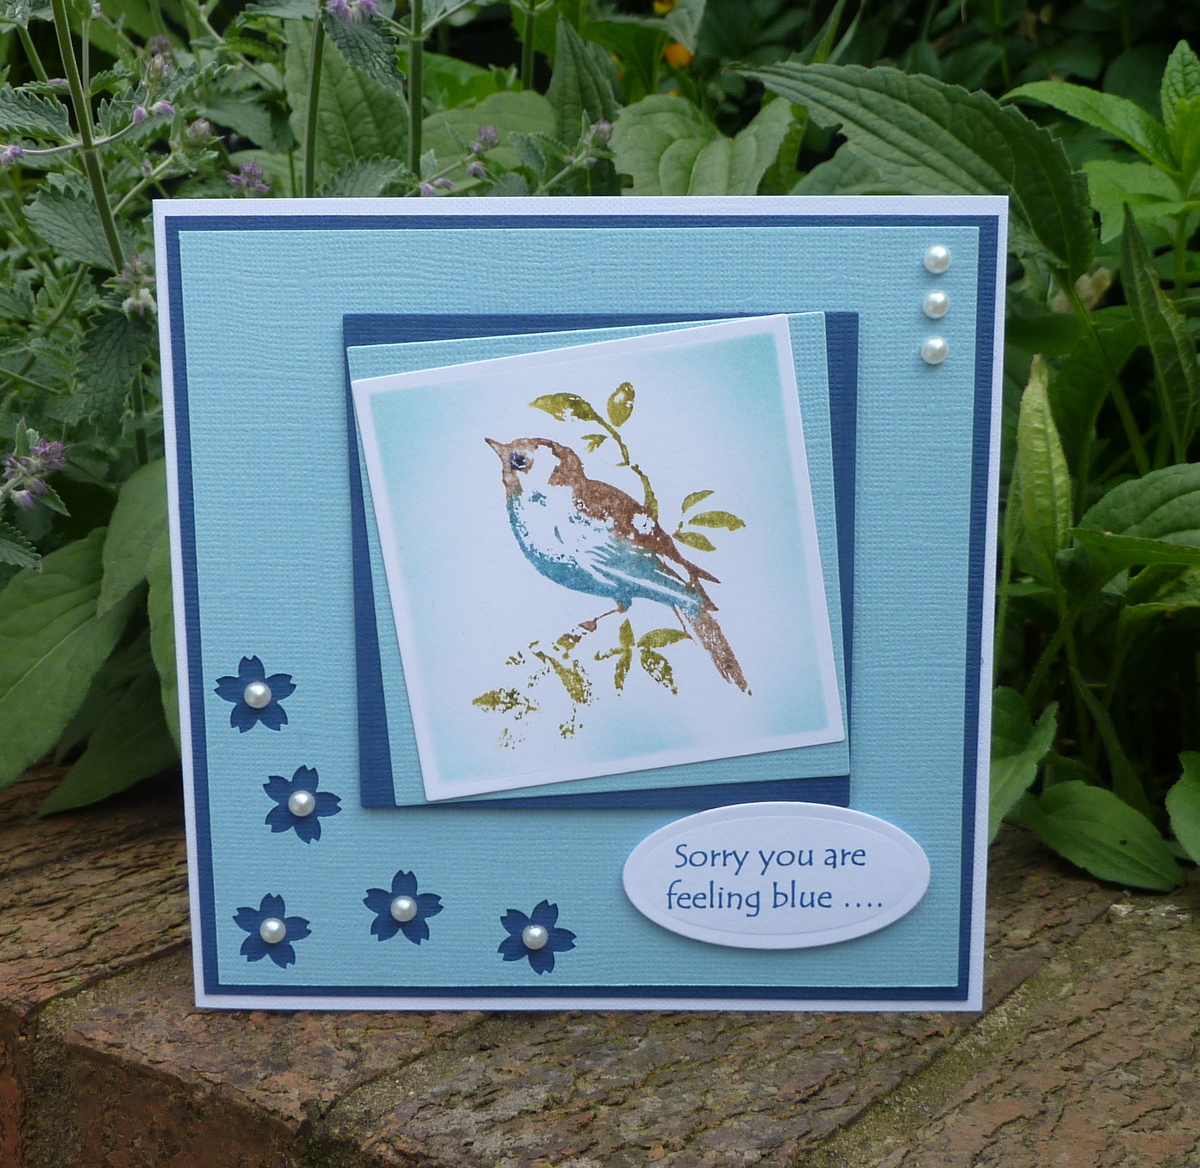
So a quick card today using the gorgeous little Stampendous "Lone bird". I used a brush less water technique with TomBow brush markers. After all the years I have been stamping this is still very much one of my favourite techniques.


As we are meant to be feeling blue I used blues on his belly. This is the nearest I will ever get to doing a watercolour picture!!
I then layered up the card on a couple of shades of blue Bazzill card stock. I punched out a few flowers out of the light blue background layer before sticking to the darker blue layer. 


The sentiment was done on the computer and then cut out with an oval die or punch.Thank goodness it is Saturday tomorrow. I am so looking forward to not having to get up early for work. Have a good weekend!!
Siobhan x

Saturday, 15 June 2013

Woodware - Sketch 24


It's a really quick card from me this week as I am away from home. So this had to be done and dusted before I left. But sometimes the cards you make in minutes are just as effective as ones you spend ages on!
It's Sketch 24 at Woodware this week. I don't know where Dorothy gets all these sketch ideas from, but at least it takes the worry about layout away from you. 
Here is the sketch :

I have used one of my favourite techniques which is water stamping. I blended some blues and greens (dye inks) onto white card stock. Starting with quite a dark background gives you the best contrast. The stamp I used is an all time favourite by Stampendous called "Agapanthus cluster". I have had it for years and still love it.


I inked the stamp with Versamark first. This helps retain more water on the stamp. Spritz generously with water and stamp. When you lift off you are left with this beautiful negative image. I also find if I press really firmly and hold for a few seconds, the paper starts to break down a bit and you get a texture to it as well. 


 The background panel uses the same stamp but using Cotton White Staz-on on vellum. I love that effect too.


 So apologies for being a bit lazy this week using techniques I have used many times before!! I hope to be a bit more creative next time. 
Have a great weekend. I don't think I will see much of Sunday as I will most likely be jet lagged!!
Siobhan x


Monday, 3 June 2013

Woodware - Father's Day Creations

93 3RD JUNE - FATHER'S DAY CREATIONS

Hosted by Feebs
It's Father's Day on the 16th of June and  I'd like to see anything you've created for or have been inspired to make by the father figure in your life. It could be anything from a card, a scrapbook page, a knitted scarf or a piece of altered art. It does not have to be specifically for Father's Day ( I don't want you spoiling a surprise for anyone) but let us know the inspiration behind your work.


We are pleased to again be playing along with the CraftyCard Makers this week, the challenge will be open on their blog for two weeks. If you would like to play along with us please check the Crafty Card Maker rules then use the link on the Crafty Card Makers Blog to add your card or if you are not a blogger yet you can e-mail your card to Dorothy as usual Dorothy@woodware.co.uk  and she will post it and add it to the Crafty Card Makers Blog.
As you can see we are teaming up with the "Crafty Card Makers" this week. I am heading to Vancouver later this week for a Nuclear Medicine conference for work. Sounds pretty boring doesn't it until you realise it's in Vancouver. Usually we occasionally get to go to Brighton or Birmingham. But this year I was one of the lucky three to be picked to go to Vancouver. Also my son is there at the moment on his travelling/working trip and it is nearly a year since I saw him. I am hoping to spend a bit of time with him too!!
Hence the need to try and be organised for Father's Day before I go!! My father loves trees and I just had to use (again) one of my favourite stamps of the moment .....Stampendous Poem Tree. I am sure Dorothy groaned when I sent the images to her and thought "not again!!"
Here is my card.

 The leaves for the background came from an old clear Stampendous set of leaves and embossed with gold powder.
In Ireland where my father lives you sometimes get amazing sunsets. The sun goes down behind the trees like a big ball of fire. So I am hoping this will remind my Dad of that.
I also decided to cover a note book to go with his card which I will take over in July when I go over to visit him.
Same stamp but just a bit distressed. The corner embellishment and the book plate I embossed with Aged Gold embossing powder. I also filled in the book plate with glossy accents and left to dry over night.


So that's it from me this week. My next post will be when I am away, provided I get a move on and make and schedule it!! Think I am going to be busy this week.
For more inspiration for Father's Day, be sure to check the Woodware blog daily this week.
Hope you continue to enjoy the better weather.
Siobhan x

Tuesday, 28 May 2013

Woodware - Backgrounds

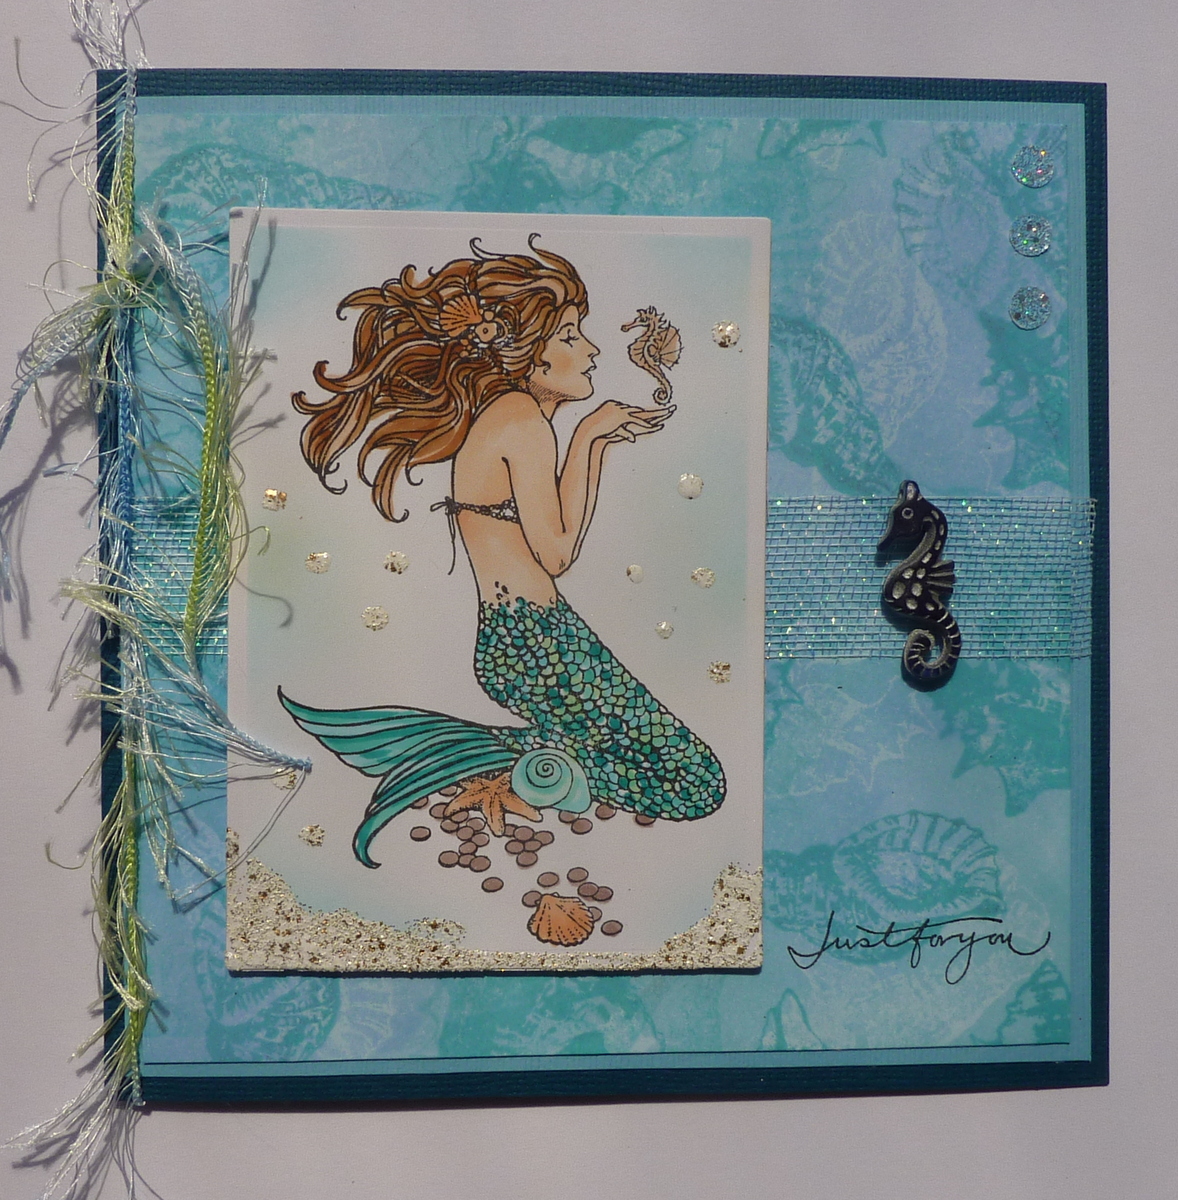
This week at Woodware we are playing with background techniques. I used to spend so much time looking through my paper stash for the perfect background for my main image. I have since learnt it is often easier to make your own. I like to layer images for backgrounds and this ghosting technique is a perfect starting point.


 For the first layer I stamped seashells (all Stampendous stamps) onto white card stock with white pigment ink. Once dry I blended over Robin's Egg, Baby Blue, Seaglass and Sky Blue over the top. I really like this subtle resist as a first layer.


 With the same stamps I stamped first and second generation inkings over the top with aqua and my background is ready to use.


The perfect background for my little Stampendous mermaid!! I added a little Shabby White embossing powder to look like a sandy seabed and to ground the image. And then I found the little seahorse in my stash as a finishing touch!!


Do check out the Woodware blog to see what the other girls are up to with their background techniques this week. 
Where did the sunshine go!! Well at least we had a nice couple of days at the weekend!!
Have a good week.
Siobhan x

Wednesday, 22 May 2013

Woodware DT - Colours of the Earth

This week our challenge at Woodware is "Colours of the Earth". I have been playing around with alcohol ink backgrounds. The plaid effect is a technique I came across on Tim Holtz's blog. I think it was his second year of doing the "Twelve Days of Christmas" tags. I love alcohol inks and this is a lovely technique once you get the hang of it.


To create this effect you need alcohol inks, a felt applicator and some glossy card. Chose 5 or 6 colours of alcohol inks that you think will go together. Squeeze a drop of each colour into the pad side by side. For a thin stripe keep the dot small, for a wider stripe make the dot wider. I like to sprinkle a few drops of blending solution onto the inks just to lighten them a bit.
Work firmly and quickly swiping the applicator across the glossy card in one direction. Move down the card always swiping in the same direction until it is covered. Turn the card 90 degrees. Do the same again and see your plaid appearing. 

 
And there you have it .... a nice plaid background to stamp on to. If you find colour combinations that you like then write them down in your notebook so you can reproduce them quickly when required.
Over stamp with a permanent ink like Memories, Versamark or Archival for best effect. And I use my heat gun to set the ink just to be sure.


The leaves were punched from copper foil. I covered them with Versamark ink then used a combination of Aged Gold and Aged Bronze embossing powders. The "Poem Tree" is a recent release from Stampendous and it looks great on this type of background.


Here is a different set of colours. The leaves were stamped with a Brilliance pad which also dries well on top of the glossy card and gives a lovely shimmer in the light. This one is for a friend's birthday that's coming up. As I had my alcohol inks out I made a batch of backgrounds for quick cards later on.
For loads more inspiration check out our blog at Woodware

Thursday, 16 May 2013

Woodware - Cards for Men

I always struggle a bit for men's cards, especially when it is someone you make cards for regularly like your hubby or Dad. So when I saw these two new Woodware clear stamps with the fishy words and the angler I couldn't resist buying them. Sadly my Dad nor my husband go fishing, but I know other men that do!!


I stamped the background words in a soft beige ink onto white card square then simply over-stamped the fisherman in black. So simple. I layered up with some beige and gold card. The background paper is from my stash and is from MME. It is double sided and as I loved both sides used both in my card layout. "Great Catch" came from the background stamp (I like to get my money's worth from a stamp!!).


The birthday wishes is from the Fisherman set and a very useful one for more masculine cards. I finished off with some bronze card candi and the lovely little metal fish charm that has lain in my charm box for years!!
If you are looking for ideas for men's cards then hop over to the Woodware blog for lots of inspiration.
Siobhan x

Monday, 13 May 2013

Tagtastic Group Meeting

On Saturday I met up with the girls in our "Tagtastic Swap" group. As always it was lovely to catch up with everyone. The theme we chose for this swap was "dry embossing" either as a background or on some element of the tag. The girls certainly didn't disappoint and produced such a great variety of tags. So as I am one of the few in the group with a blog, I like to post our tags so we can keep up with what everyone has made.
So here goes, in alphabetical order :

ERIN


 ISOBEL


LIN


LINDA


LIZ

MAGGIE

 
PAT 

 
 SIOBHAN


SUE


 As you can see, they are a talented bunch. We are having a break now until August. When we meet next we will hopefully have 3 tags each to swap. I better be on the ball that day to avoid total chaos!! Our next 3 themes are :
  • Alcohol inks
  • Brush less Watercolour
  • Stencils
I had a day off today and decided to take a trip to Stirling to look at sewing machines. I have been doing quite a lot of research and had narrowed it down to two. The lady in Pemberton's was very helpful in demonstrating the machines. So decision made I came back with a Husqvarna Sapphire machine that is amazing!! I went by train and carried this thing all the way home as I couldn't wait to have it delivered!! Now I can maybe finish some of the many sewing projects I have on the go!!
Have a good week everyone.

Siobhan x 


Friday, 10 May 2013

Woodware - Sketch 23

Time for another sketch challenge at Woodware this week. This is our 23rd sketch!! Anyway mine is very simple.
This is the sketch we were given :


And here is my sample card.


I stamped the Stampendous fresh bloom with Versamark and embossed with white powder. Over the resist I rubbed ink from the Brilliance ink pad "Aurora". The three colours work well together.
The sentiment is from a Woodware clear set by Jane Gill. A useful sentiment for several occasions I thought!!

 
Our tag group meets on Saturday. So I will be posting our latest efforts over the weekend. The theme this time is "Dry Embossing". I always look forward to meeting up with the "girls" for a natter and see what they have all made.
Hope you have a good weekend!!
Siobhan x

Saturday, 4 May 2013

Woodware - graduation

I have been a bit quiet on the blogging front of late. I don't know if it's my age but this whole menopause thing has really taken it's toll!! By the time I get home from work all I want to do is have dinner and veg in front of the telly. Energy was something I used to have plenty of but now I could really do with an afternoon nap just to get through the rest of the day!! The say age doesn't come itself ....... I think what I need now is retirement!!! Bring it on, I can't wait!!
Anyway enough moaning. I am last up this week for Woodware's graduation theme. I don't own any graduation stamps supplied by Woodware so I have had to improvise a bit.


I used a Stampendous stamp "Scrolled Medallion" to create the background. I stamped it repeatedly in gold and embossed with gold powder onto antique gold card stock. The words are another Stampendous stamp "Every Day Dreams". As I didn't have an appropriate graduation sentiment, I thought this would do nicely.

 
 A bit of organza ribbon separates the two panels.
I used an old Quickutz die of the mortar board and diploma scroll to make my topper to go onto a square stamped and embossed with a fine script (also Stampendous).


A very simple card, but as they say often less is more. If you are looking for ideas for graduation cards then check out the Woodware blog this week. All of the samples from our DT are very differenttand sure to give you some inspiration.
Three days off work .....yippee.
Have a good weekend everyone.
Siobhan
 

Monday, 22 April 2013

Woodware - White ....

I had so many plans this weekend but as usual here I am on Sunday night wondering why do weekends always fly by!! I am first up this week for the Woodware DT and our theme is white!! I thought this will be easy, but actually it's not. Also this week I had a lot of birthday cards to make so I kind of left this challenge to the last minute. So apologies for a rather quick and simple effort this week.
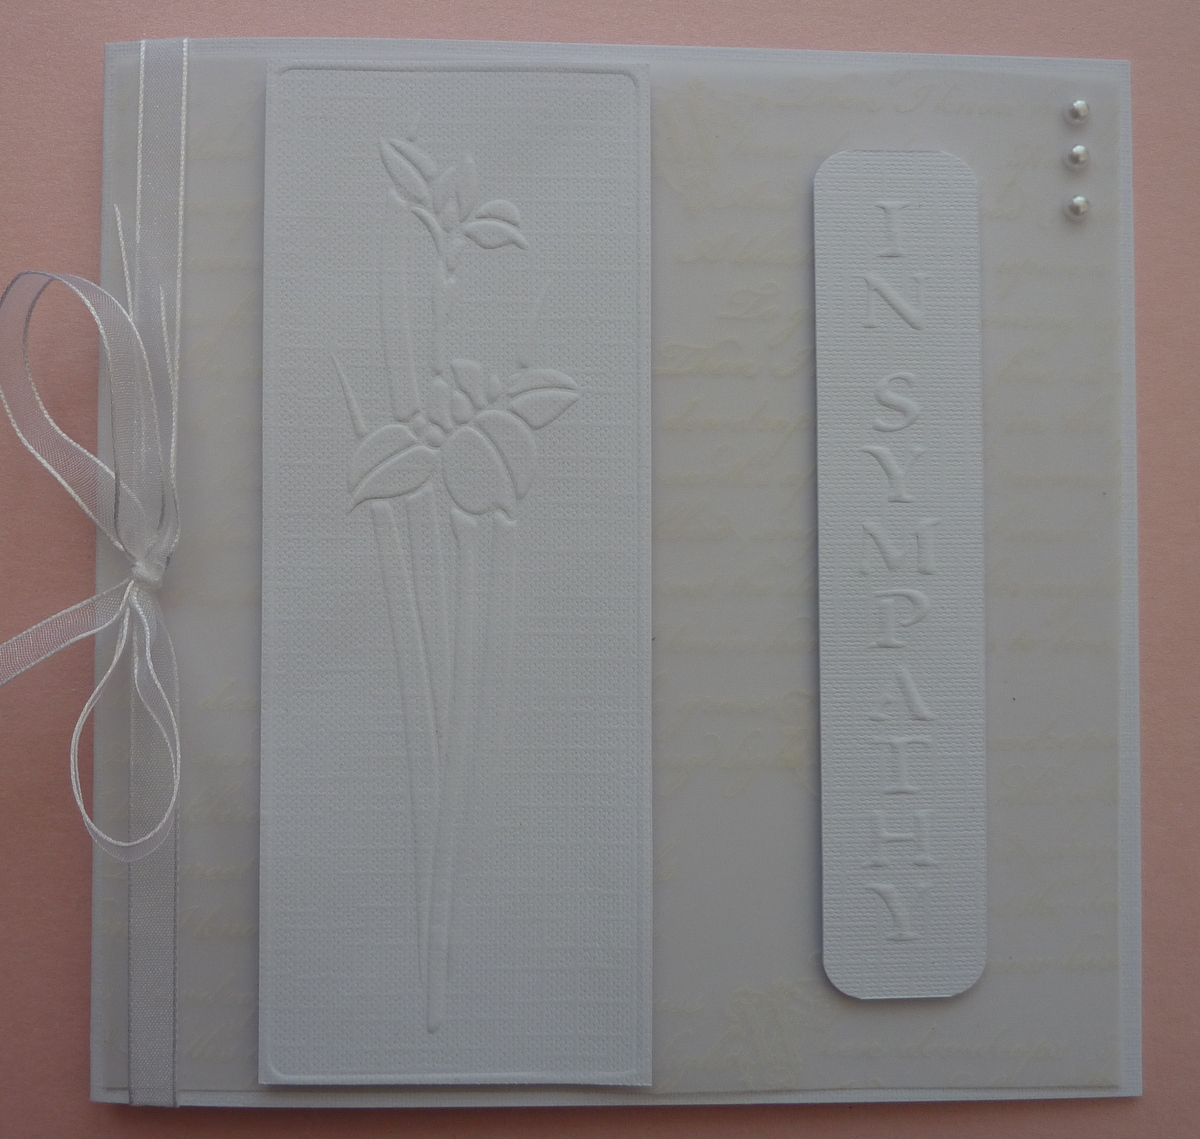
For me white cards imply either bridal or sympathy. So rather predictably I went for sympathy. 


The other problem I found with white is that it is difficult to photograph and make look good. Basically I used a script stamp on to parchment paper or vellum stamped with Cotton White Staz-On.
Then I stencil embossed the iris and the sympathy onto white linen card. Both are Dreamweaver stencils.  


Not my best effort I have to say. But hopefully the other girls will provide some better inspiration for the rest of the week.
I was asked at short notice to make a couple of large cards for 60th birthday's at work this week. I very rarely make such big cards so that was a little challenging. The female one was to be in lilacs and lavender and have butterflies. So this is what I came up with. 


Since I took the photo I have changed the butterfly on the postcard for a paler one stamped on vellum and cut out which looks better than this dark one. I had to join the two sheets of A4 together with a folded piece of paper at the top but it seems to have worked. The card I made for a male colleague was with a golfing theme but I forgot to take a picture of it before handing it over!!
Hope you all have a good week. 
Siobhan x

Tuesday, 16 April 2013

Crafty Cardmakers - Tag/Card with matching gift bag/box of gift wrap

Hello we have something different for you this week…


We are sponsoring the challenge over on the Crafty Card Makers this week, so we thought we should just play along with their choice of topic (gives my brain a rest), so if you blog please use the link on the Crafty Card Maker’s blog to add your card and if you don’t if you e-mail your card to me and I will post it here and add it to the challenge, but check out the rules as we are playing by the Crafty Card Makers rules, good luck and thanks for playing.

I made an origami folded box with matching card and tag for my take on this week's Woodware challenge.


The origami box is one I make quite often as it is quick and very effective. I got the idea from a book of origami I gave my son but I have since found a You Tube clip of Karen Thomas showing you how to fold the pieces. This size uses to sheets of 12 x 12 scrapbook paper cut into 6 inch squares. I like to use two sheets from each design to get this alternating pattern.


I have also made the box using 8 x 8 inch squares and it is a really useful size. 
Here are the links if you want to have a go :
The first video shows you how to make the box top and the second, the box bottom.


I finished off the top by adding a chipboard tile that I built up layers of embossing powder and stamped into it. 
Here is the coordinating card:

 
The stamping was all done with one of Stampendous's Quad cubes. This is the paisley cube. I have had this for years but I believe it is still available. The chipboard cube is made using a deep impression embossing technique. I built up about 3 layers of Aged Bronze Frantage powder. Before heating the final layer I inked the stamp with Versamark. This I find helps release the stamp but it also makes the indented part of the impression sticky, allowing time to brush over some mica powder. In this case I used a smokey blue colour. I think it makes the piece a sort of Patina effect. 
The 3 circles were just stamped with Versamark and embossed with the same powder.
To finish the ensemble I made a quick tag: 

 
I like the idea of making mating gift packaging and card. It makes the recipient feel that you really have made an effort!! This design is quite masculine. I have in the past made a little origami shirt out of a bank note to fit inside the box ... this usually goes down well!!
Siobhan x

Wednesday, 10 April 2013

Woodware - Vellum

It's time for this week's challenge from Woodware. This week we are using vellum. I remember years ago how difficult it was to buy good patterned vellum. Then along came white Staz-on and then it became easy to stamp your own vellum. So this project kind of reflects the beauty of creating lovely patterned vellum to suit your theme.
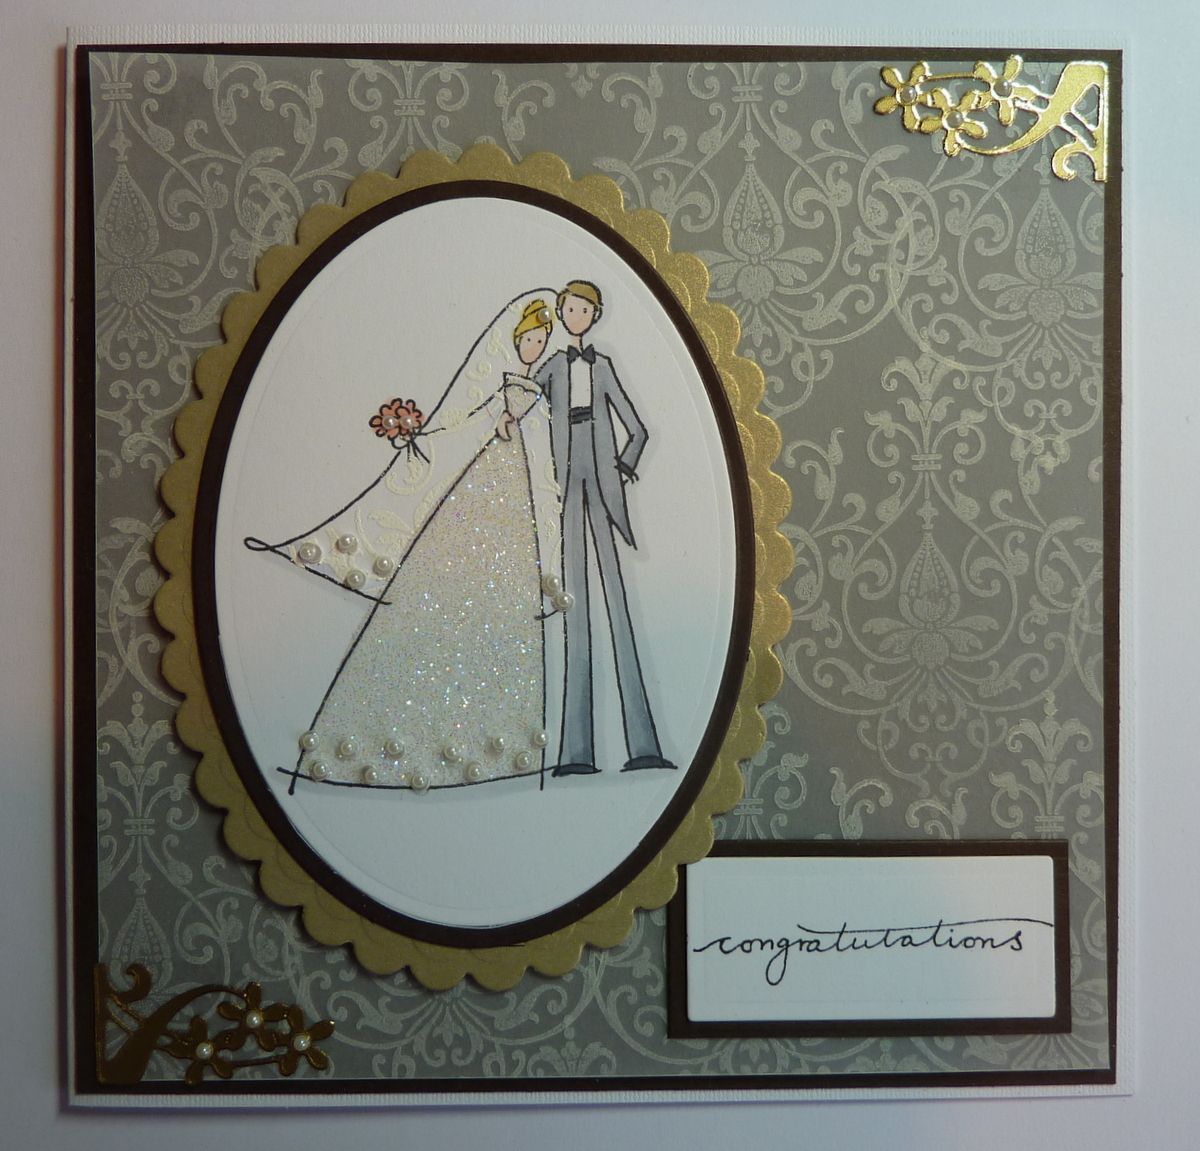
I have stamped a square panel of vellum using a lovely scrolled medallion from Stampendous CRV268 and a Cotton White Staz-On ink pad.


The bride and groom is also a Stampendous image, an old one now but is still available and now on cling (V126 Happy Couple). For the brides veil, I stamped the image onto a post-it note and carefully cut out the veil to create a reverse mask. This was placed over the main stamped image and I stamped the medallion on top of the mask using Versamark. Once the mask was removed I covered with detail white embossing powder and embossed with my heat gun.


For the brides dress I stamped onto double sided adhesive film and cut out just the dress. Take off the back contact sheet and stick exactly on top of the main stamped image. After removing the top sheet I stuck down the pearls. The stick better before adding glitter! Then pour over a fine crystal glitter. This technique always gives you a very even layer of glitter, something I find hard to get when using a glue pen and glitter.
Rather than stick the vellum down I have stuck it under the bride and groom topper and used a couple of corners (peel-offs or die cut) the hold down a couple of corners.
So that's it for this week folks. For more ideas using vellum be sure to check out the Woodware blog this week.
Siobhan x
Related Posts Plugin for WordPress, Blogger...